Google Calendar API and Ruby on Rails
I recently published a new and improved version of this Google API + OAuth post over on the Twilio blog which includes code for refreshing access tokens. You’ll be better served reading that one instead.
This post is for the guy in the spot I was in last week: Googling things like “authenticate Google Calendar API via OAuth2 in Ruby on Rails”, and finding no clear result. I hope this saves you some hours.
If there’s a one-stop answer on how to make Ruby on Rails, OAuth2, OmniAuth, and the Google Calendar API all play nice with one another, I haven’t found it. Typically, when I hit a roadblock while programming, I’m able to google-copy-paste my way through it, but figuring out how to sync a Ruby on Rails app with Google Calendar has required a patchwork of solutions from a number of sources.
The watershed came when I stopped trying to find a quick-fix, put aside the app I was working on, and took the time to learn more about OmniAuth, and the Google API OAuth2 strategy. Here’s how it went…
Register your app via the Google API Console
Before you do anything, you have register your app via the Google API Console. Create a new project, turn on the Google Calendar API, and click API Access. You’ll end up at a screen that looks like this:
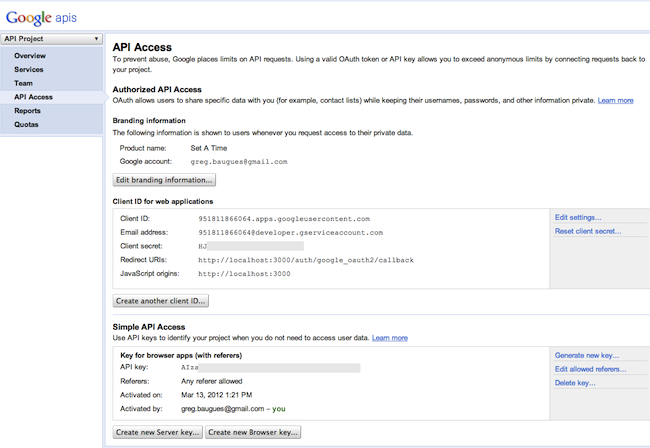
We’ll need that CLIENT ID and CLIENT SECRET later, but for now click Edit Settings and add an Authorized Redirect URI of:
http://localhost/auth/google_oauth2/callback
Clone RailsCast Episode 241 Source Code
If you haven’t worked with Omniauth before, watch Ryan Bates’ Simple Omniauth RailsCast. Once I learned how to use OmniAuth to interact with the Twitter API, I was halfway to figuring out how to use OmniAuth to authenticate with the Google Calendar API via OAuth2.0. To make it easier to follow along (both with the RailsCast and this post), open a terminal, and clone the Episode 241 Git Repo inside a new directory:
git clone git@github.com:railscasts/241-simple-omniauth.git
Setup the database:
rake db:create
rake db:migrate
And run bundle install
Edit your Gemfile
Once you have the source code, change your Gemfile to look like this:
source 'http://rubygems.org'
gem 'rails', '3.0.3'
gem 'sqlite3-ruby', '1.2.5', :require => 'sqlite3'
gem 'nifty-generators'
gem 'google-api-client', :require => 'google/api_client'
gem 'omniauth', '1.1.0'
gem 'omniauth-google-oauth2', :git => 'https://github.com/zquestz/omniauth-google-oauth2.git'
Then run:
bundle install
We’ve made three changes to the Gemfile. They are…
google-api-client
One of the first steps in the Google Calendar API v3 Documentation, is to set up the Ruby client library. Unfortunately, the examples given are for Sinatra or plain ol’ Ruby. The docs don’t mention that if you simply add this line to your Gemfile:
gem 'google-api-client'
you will get an error that looks like this:
NameError (uninitialized constant SessionsController::Google)
Instead you must use the :require syntax from above (props to Roo on StackOverflow).
omniauth, ‘1.1.0’
Google Calendar API v3 requires OAuth2.0 authentication, which is only supported by OmniAuth versions 1.0 and above. OmniAuth 1.0 is significantly different from the version used in the RailsCast.
omniauth-google-oauth2
OmniAuth uses swappable “strategies” to connect to services such as Facebook, Twitter, FourSquare, etc. We are replacing the Twitter strategy from the RailsCast with the Google OAuth2.0 strategy. To make this work right, replace the existing app/initializers/omniauth.rb with:
#app/initializers/omniauth.rb
Rails.application.config.middleware.use OmniAuth::Builder do
  provider :google_oauth2, CLIENT_ID, CLIENT_SECRET, {
    access_type: 'offline',
    scope: 'https://www.googleapis.com/auth/userinfo.email https://www.googleapis.com/auth/calendar',
    redirect_uri:'http://localhost/auth/google_oauth2/callback'
  }
end
What does all this mean?
CLIENT_ID, CLIENT_SECRET
Replace with the keys you got from the Google API console. The proper way to do this is to store the values in a YAML file, but for the sake of moving fast, just copy and paste them into the code for now.
access_type: “offline”
This says that you want access to the user’s data even when they’re not at the browser. This is a recent requirement, ushered in with other changes to the Google API OAuth2.0 endpoint back in December 2011.
scope
This is a good place to get tripped up. You would think you would only need to request the calendar scope, but because of the way that OmniAuth makes the request, if you do not also include the _userinfo.email_scope, you will receive an error that looks like this:
{"errors"=>{"domain"=>"com.google.auth", "reason"=>"invalidAuthentication", "message"=>"invalid token", "locationType"=>"header", "location"=>"Authorization"}, "code"=>401, "message"=>"invalid token"}:
{
 "error": {
  "errors":
   {
    "domain": "com.google.auth",
    "reason": "invalidAuthentication",
    "message": "invalid token",
    "locationType": "header",
    "location": "Authorization"
   }
  ,
  "code": 401,
  "message": "invalid token"
 }
}
(props to Lachlan Cotter and Andre Goncalves.)
Add a callback route
OmniAuth automagically sets up a route for /auth/google-oauth2 (which does not appear in routes.rb) that sends the user to Google to ask if he’d like to give permission to our app. We need to set up a route to catch the response when Google sends us a callback. We’ll use the same one from the RailsCasts, but if you’re not following along with his code, it looks like this in your routes.rb:
match "/auth/:provider/callback" => "sessions#create"
Notice that the path /auth/google-oauth2/callback matches the callback URI we gave in the Google API console.
Create the callback function
Our routes.rb redirects the callback URI to the create function in the sessions controller. We’ll blow away Ryan’s callback function and replace it with one modified from Google’s Your First App. This controller does two things:
- Get authentication data that was given to Omniauth by Google
- Use the token from that auth data to request a list of calendars
class SessionsController < ApplicationController
  def create
    #What data comes back from OmniAuth?
    @auth = request.env["omniauth.auth"]
    #Use the token from the data to request a list of calendars
    @token = @auth["credentials"]["token"]
    client = Google::APIClient.new
    client.authorization.access_token = @token
    service = client.discovered_api('calendar', 'v3')
    @result = client.execute(
      :api_method => service.calendar_list.list,
      :parameters => {},
      :headers => {'Content-Type' => 'application/json'})
  end
end
View the results
My view simply dumps the contents of @auth and @result.data to the screen
#/app/views/sessions/create.html.erb
<%= debug @auth %>
<%= debug @result.data %>
Do It!
Now we just need a link to the OmniAuth path to kick off the party. In /app/views/layouts/application.html.erb with, replace line 17 (the “Sign in with Twitter” bit) with:
<%= link_to "Sign in with Google", "/auth/google_oauth2" %>
Launch your rails server, visit the home page, and click the link. OmniAuth takes over, directing you to a screen you’ve probably seen before:
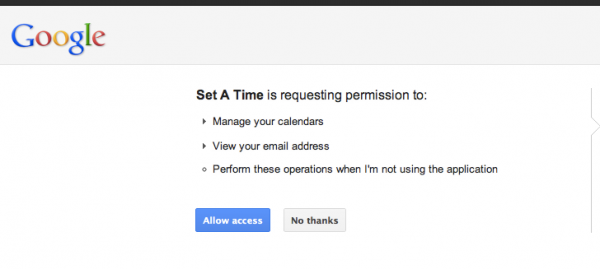
Confirm, and if all goes well, you’ll get output that looks like this:
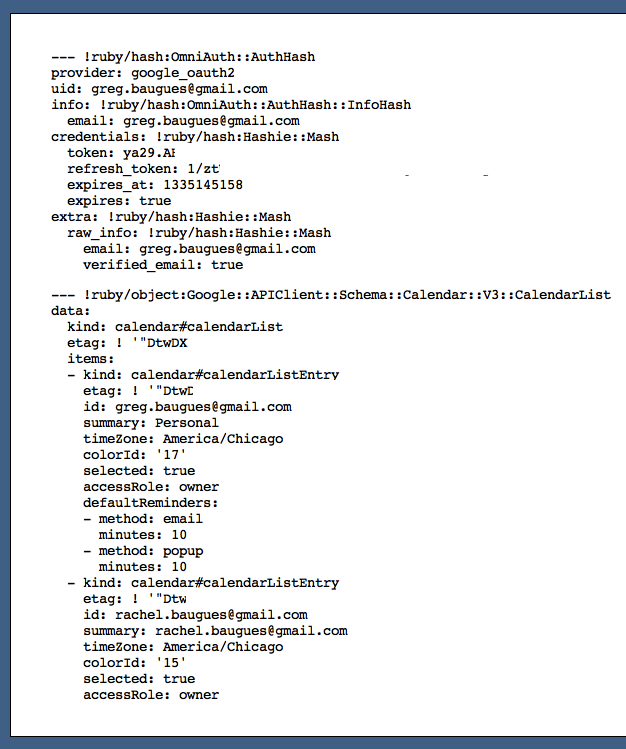
In @auth you can see the token, request token, and expires_at, which you’ll presumably want to store in the database. Below, in @result.data, you can see that I am the proud owner of two Google calendars.
Once you’re here, the hard part is over. Anything else you want to do with the calendar - add events, check free/busy, etc. - can be accomplished by changing the two lines below using your favorite functions and parameters from the Google Calendar API reference.
:api_method => service.calendar_list.list,
:parameters => {},